Well it finally happened - I stopped taking things apart and finally did something constructive! My first bit of "restoration" took place!
I settled on stripping down and rebuilding the propeller shafts for no good reason other than they were the first thing I saw when I looked at the big pile of Pod in the garage.
Here is what they looked like when they were removed from Pod. Front:
And rear:
Getting the old universal joints out was a fun job - they were actually in pretty good condition, but my approach for this renovation is typically to replace things like seals and bearings as I have no idea how old they are or how they have been maintained. Pretty much everything else will be "restored" one way or another. The old UJs were Hardy-Spicer - same as the new ones. So obviously not original, but quality parts nonetheless.
When it comes to renovating metal parts like this, generally I will do the following - degrease, wire brush, primer, top coat. Here's a picture showing what the application of a wire brush can do - the part on the left has been degreased, the part on the right has also been wire brushed.
So each prop-shaft component was masked up:
Given a coat of red oxide primer:
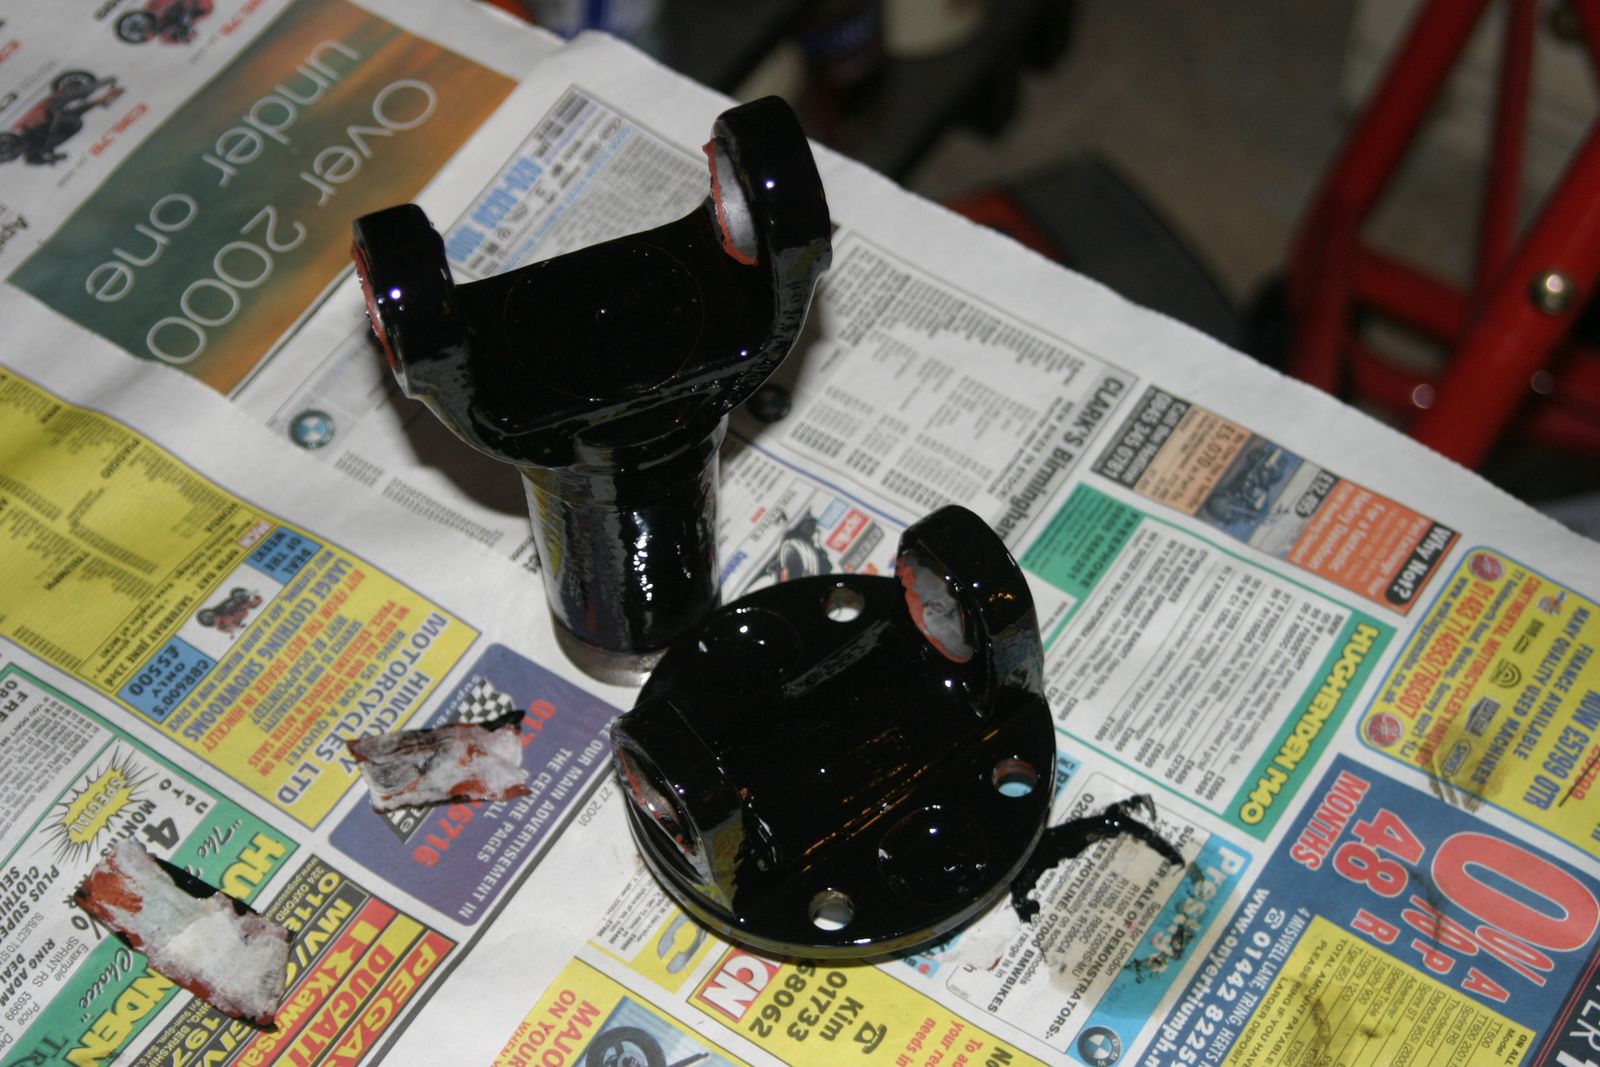
And then a coat of black gloss:
A quick word on the paints I'm using - I did a little reading around the subject of primers, and discovered that all red-oxide primers are not the same. "Red-oxide" is essentially iron oxide or, as it is better known, rust. Its purpose in primers is actually to provide a "filler" to help the paint smooth out imperfections in the surface being painted. As a barrier to prevent moisture getting through it's pretty useless. More expensive primers will contain rust converters, and also glass "plates" to create an impermeable barrier. The primer I eventually bought is called
Corroless S and contains a rust converter, zinc phosphate and glass plates, plus a bit of red-oxide. It's normally used for painting oil rigs and so on!
Over the top of this mega-primer, I'm using good old
Frosts chassis black. This is decent paint at a sensible price - and it's easy to touch up the chassis and associated parts once a year, provided the base paint continues to do its job.
The prop-shafts bits are all painted up now, ready for re-assembly. How exciting!